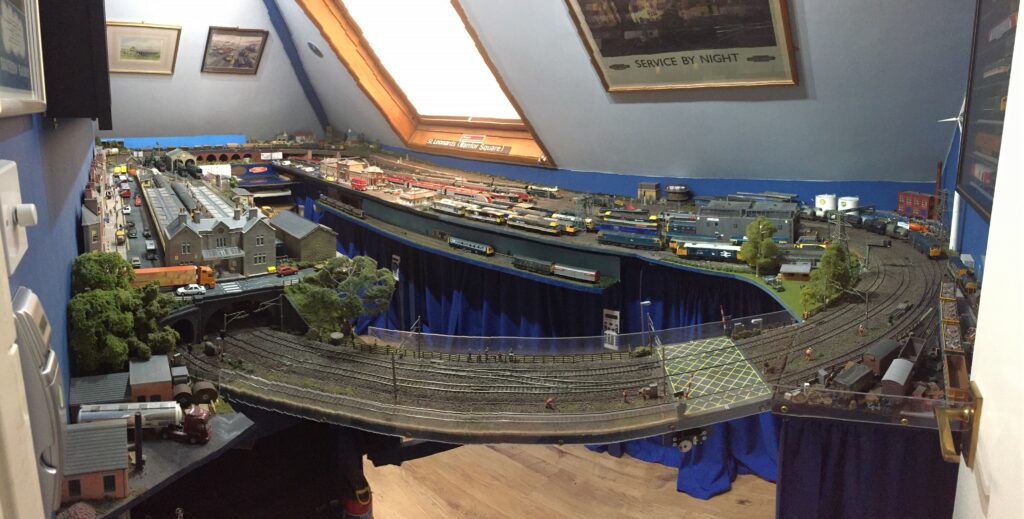
The layout runs around the outside of the room with room for the operators in the middle. Access is via a swinging section which carries the three main loop tracks and has a level crossing and a crossover on it. (this is closest to the camera on the panorama below, in real life it is straight but the panorama has distorted this).
The loops consist of a double track main line which is linked to most of the storage sidings and platforms in Tedoford station via complex junctions plus a relief line which only works with the outermost storage and platforms. These passe an industrial area including a scrap yard and oil depot and run to the rear of Tedford Diesel Depot. Here there is a complex junction with two double slips, a single slip and a crossover where the branch to Bearham leaves the main line. The junction also provides access to the 5 platform faces at Tedford. The branch to Bearham rises up at a gradient of about 1 in 30 then passes over the far end of Tedford station where it forms the scenic break to the fiddle yard, with a village in the far corner of the layout. It then passes over a viaduct and to the rear of Bearham engine shed and turntable before going reaching Bearham station via a simple single track junction (essential to fit everything in).
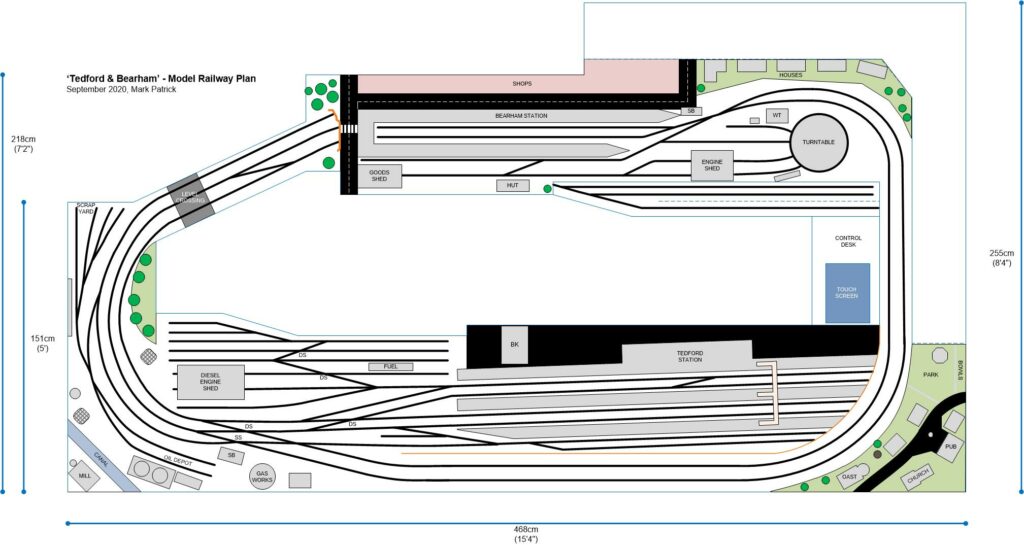
The design of both Tedford Diesel Depot and Bearham Engine Shed has been optimised to store and display as many locomotives as possible and the track layout is therefore not entirely prototypical. In particular there is no headshunt at Tedford due to a lack of space so shunting movements must use platform 1 of the station. Tedford Diesel Depot has been expanded over the years with more storage tracks. Bearham Engine Shed is intended to display my collection of steam locomotives which somehow find a home on this otherwise modern image layout. The main fiddle yard is located under Bearham station. There is only very limited clearance of about 10cm, more would have been nice but this was dictated by using a sensible gradient in the length available to reach Bearham. Access to the fiddle yard is possible once rolling stock is removed from Bearham by hinging up the two baseboards that this area of the layout is built on. These baseboards do not have bracing attached to them but instead rest on supports fixed to the lower level. The fiddle yard tracks are fitted around these and also the base of the turntable. There are 8 through roads and 3 terminus roads reached from the swinging section end. Each of the 4 through platforms at Tedford opens out to 2 fiddle yard roads. At the other end of the fiddle yard there are crossovers to permit movements to and from either line across the swinging section.
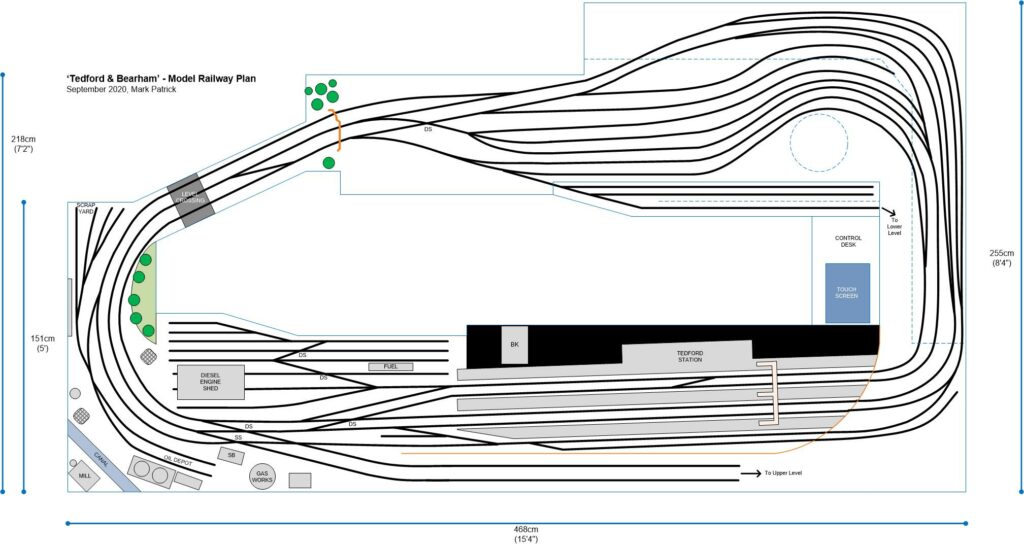
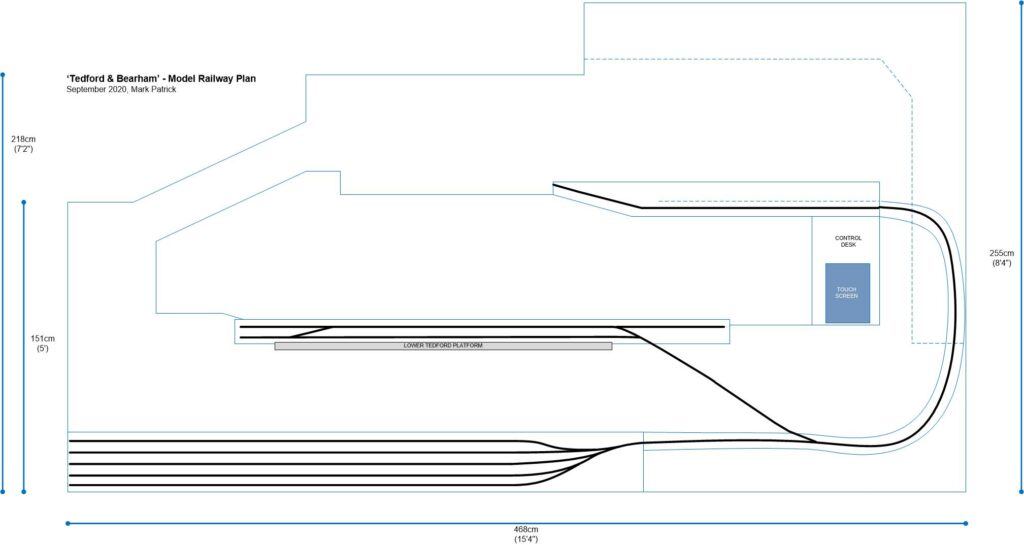
The storage capacity has been expanded with two additional terminus roads along the edge of the open centre of the layout next to the control panel, which was rebuilt and turned through ninety degrees to fit this modification in. Another track drops down by the control panel to a lower level storage yard with 5 roads to the rear of the layout. These are under the main station and are lit and fitted with cameras to allow remote operation. There are 2 further storage tracks at the lower level but at the front of the layout which have been given basic scenic treatment as Lower Tedford Station. It is possible to run shuttle trains from here to Bearham.
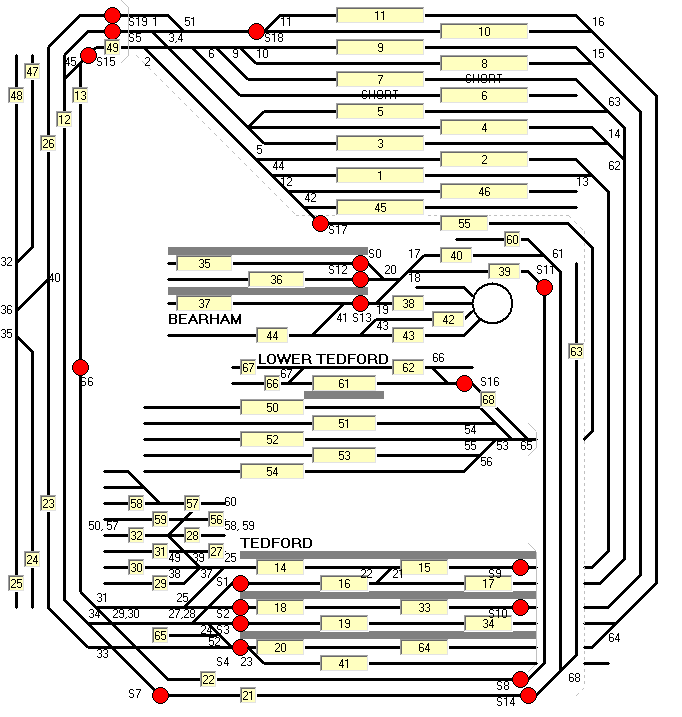
For the computer control system, the track layout has had to be stretched and modified in a similar fashion to the tube map in order to show both stations, the fiddle yard and the lower storage tracks all together. This has been done by placing Bearham Station and the lower storage tracks in the middle. The numbers are the point, signal and button numbers. When the software is running these are not shown.